
The steps involved in designing an iPhone app are unique. They are somehow both not as tricky and not as easy as most people imagine. I may not be a programmer by profession, but I was interested in finding out whether I could learn how to create iPhone apps. There are always IT wonder kids in the papers who become child prodigies after designing an iPhone app at six years old – can it really be so hard?
In theory, developing an app is sort of like cooking a delicious meal – there is a distinct process involved, a series of important steps. This report is not concerned with the style of your iPhone app ‘dish,’ but the list of stages and instruction which are needed to lift it out of the brain and straight into the iTunes store.
Unfortunately, there are usually charges associated with making an app. You should not embark on this journey if you do not have, or are not willing to pay, the $99 fee. Plus, you will also need to get hold of a Mac computer at some point, if you do not already have one. At least one of the development stages requires the use of Mac compatible code.
So, now that all of the little details have been settled, it is time to read on and find out what to do next.
Step One – Come Up With a Clever Plan
Do you have a great idea for a new app? You might want to think about just how many apps there already are on the market (millions) – does your idea stand out from the crowd? What exactly is it that makes an app more interesting than the one sat next to in the App Store? What makes your app appealing to users?Would they be willing to pay to play with it?
It is important to check that there are not any other apps available which are offering the exact same thing as yours. The only time that you should allow this to happen is if you are confident that you have come up with a way to improve an already existing app. Your plans must be clear, concise, and cohesive – you have to market the advantages to users.
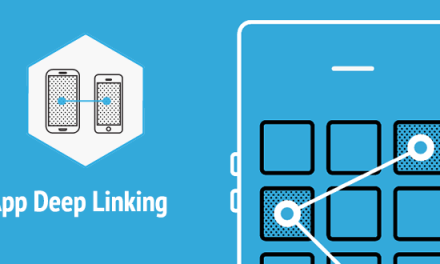
Step Two – Find a Mac Computer
The iPhone is an Apple invention and it runs using a special version of the Mac OS. This means that only Mac users get to play around with the special iPhone development resources. Whilst it is, technically, possible to jailbreak the whole process and access the tools on a regular computer, you are only going to need to use a Mac at the end anyway – it is not worth the hassle. If you do not own a Mac, you could borrow one from a friend or even pick up a relatively cheap Mac mini.
Step Three – Register as an App Developer
In order to use the Mac developer resources, you will first need to register as an Apple developer. This does not cost anything – all you have to do is fill in your personal details and agree to the terms and conditions. You should only ever need to do this one time, because you can reuse the login details for future projects. Once registered, you can legally create iPhone apps.
Step Four – Download the Software Development Kit (SDK)
Now, it is time to download the Software Development Kit for the iPhone. The version of the software that you require will depend on which OS you are using. It is important to note that the download itself is very large. It contains all kinds of instruction guides, legal reports, sample codes, and anything else you might need to create a fully functioning and sellable app. The download may take two or three hours to finish.
If you feel like you need more support, head over to ManiacDev.com and check out some of the instructional videos. The content is designed to assist a whole range of abilities, so you do not need to be a development extraordinaire to understand them – just pick a video which matches your ability.
Step Five – Download XCode
If you have not already, download XCode. This is an invaluable tool and, in the words of Apple itself, provides a ‘total and comprehensive IDE founded upon a streamlined workflow which assimilates the alteration of source code (with the build and compile steps) and all the way through to the graphical debugging process. This is without need to leave the perspective of your source code.’ This is another big download and could, again, take a few hours to finish.
Step Six – Design the App Using SDK Guides
You first need to map out your app, either directly onto paper or using Photoshop. Once you have done this, you can start to design it with the template guides from SDK as support. This is the point at which you will start to understand why downloading so much material was a worthwhile choice. There should be a huge number of different templates to play around with.
Step Seven – Master Objective C
For anybody with a real passion for programming languages, learning how to master Objective C should be quite a nice prospect. If you do not have much programming knowledge, however, things are going to get a little tricky. You are highly advised, if this is the case, to rope in a friend with a little more skill than you, just to act as a guide. Or, alternatively, you could pick up a book on programming.
Step Eight – Program the App with Objective C
You need to understand the fundamental concepts of Objective C before you proceed. Once you feel like you have a reasonable working knowledge of the language, it is time to program the app. It is a good idea to snap screenshots of the process as you work, so you have no trouble keeping track of the different things that you have changed.
Step Nine – Assess the App with the iPhone Simulator
If you dig deep into the SDK, you should find a handy iPhone simulator tool. This is how you load up your newly programmed app and assess its function. It is important to address as many of the identified errors or bugs as you can. Unfortunately, this is the point at which the process gets costly, because it will set you back $99 to load your tested app into iTunes.
Step Ten – Submit the App for Official Approval
Once you have been through the rather fussy testing stages (both on your own terms and within the iTunes development community), it is finally time to submit it to Apple for official approval. It can take a while for Apple to reach uploads (you have to think about how many apps are submitted on a weekly basis), so be patient.
Step Eleven – Wait and See If Users Like the App
If your app comes with a small user fee, the indicator of success will be if people are willing to pay it. You know you have designed a great app when users are happy to cough up their hard earned pennies to play with it.


